Showing posts with label Crafts. Show all posts

Monday, June 1, 2015

Tie Dye DIY cover-ups and/or workout shirt

I thought I'd jump back to my younger years for a minute and see what kind of tie dying skills I could bestow upon all those that view this blog of mine. I mean, since I have all the time in the world, said no Mom to an infant...ever, I thought why not throw this fun messy project in the mix! So here's how my new little project turned out, not too bad!
 I tried out a couple different types of white shirts, the far left is a $2.99 shirt from my local craft store, middle is a basic Gerber Onesie and the far right is a Hanes super soft shirt that comes in a 3 pack at Target. So I started by washing them then did a little different of a design for each.
  • Left- One spiral (technique pictured at the upper right)
  • Middle - Was supposed to be the tiger stripe but ended up being more of just a blend of colors, which I actually really like!
  • Right - Double spiral (Double over the fabric then do the same spinning technique as I shown above)
Mix your dye, per the instructions (I used the Tulip brand) and place 3 rubber bands in a start pattern for the spiral shirts (You should then show 6 triangles in which you'll color 2 triangles pink, 2 purple and 2 teal) and then use 3 rubber bands, for the image I got on the onesie just crumple and fold the onesie in half (Watch this tutorial) and put the 3 bands on a couple inches apart and color it as desired. 
For this shirt style, I cut about 2 inches below the bottom of the sleeve and cut quite a bit more up to the shoulder. I kept cutting more and more as I'd try it on after each cut and it kept looking to bulky, so just cut until its the fit you want. I also cut about 2 inches off the collar plus an additional 2 inches at the chest area to make it lower. Then fold JUST THE BACK of the shirt in half and make as many cuts as you want, do them a little shorter at the top and cut longer strips as you go lower down the back. Then just pull them to stretch them out a little. I then made one cut up the bottom right of the shirt and made a little knot so it would fit tighter.
For this style, cut the collar and the sleeves the same as above BUT after you've done that, flip the shirt over so you're looking at the back and cut the back further in than the front so you have the razor back affect. Now cut straight across from left arm hold to right arm hole so the collar is no longer attached. See the picture above. Then cut the left over razor back into 3 pieces, braid it and run it through the sewing machine to keep it together. Take an extra 2 inch piece of fabric from everything you've cut and sew it to the back color that you've just sewn the braid too. Then wrap it around, over and back around to cover up your stitching. I then did a blind hand stitch to hold this fabric in place. Voila! You're done!

I now have a couple of fun tops to wear to the gym, running errands, working in the yard, going to the beach, anything really when you just need to throw on an easy top and you aren't trying to impress anyone :). These will of course be impressive when you make them, but they aren't so much for a nice occasion. :)

Other than dying a couple of my fingers purple, I'd say this was a pretty accident free project. So with that I will recommend to double up on gloves! But if you happen to dye yourself, nail polish remover and a lot of hand washing got the color out.

Good luck!

Tuesday, April 28, 2015

Everyday DIY Wreath

I always want to have a wreath on my front door, but in between holidays I've never found a wreath that I've really loved so I decided to make one! I've seen a few places where people have decorated a wreath out of what looks like dead branches (sounds like a great start for a pretty wreath, right?!) so I wanted to do my take on one of those.

Here are the steps I took to make it... Just need a couple things:
  • A letter from your local craft store
  • Twig wreath
  • Faux flowers of your choosing
  • Fun ribbon
  • Hot glue gun and some wire cutters to cut the stems of the fake flowers
  • Optional ** Paint to refinish your letter if you wanted a different color
This letter was originally tan but I wanted a crisp white so I pulled a spray can from my husbands garage and sprayed away! Then left it for a few hours to dry
I hot glued the ribbon down just by places a couple dots under each strip but I left the opposite side of where I placed the letter unglued until I placed the flowers through it, that way I could hide any gaps with the ribbon.

Then from this last step, Just place the flowers in the arrangement you like and stick them straight through the wreath and just clip off the extra stems. I placed a dab of the hot glue on the backside of the wreath where the stems were just for extra security. Now time to hang it up and enjoy for months to come before the next holiday pops up!


Wednesday, April 8, 2015

DIY Baby Bumper for your Fireplace

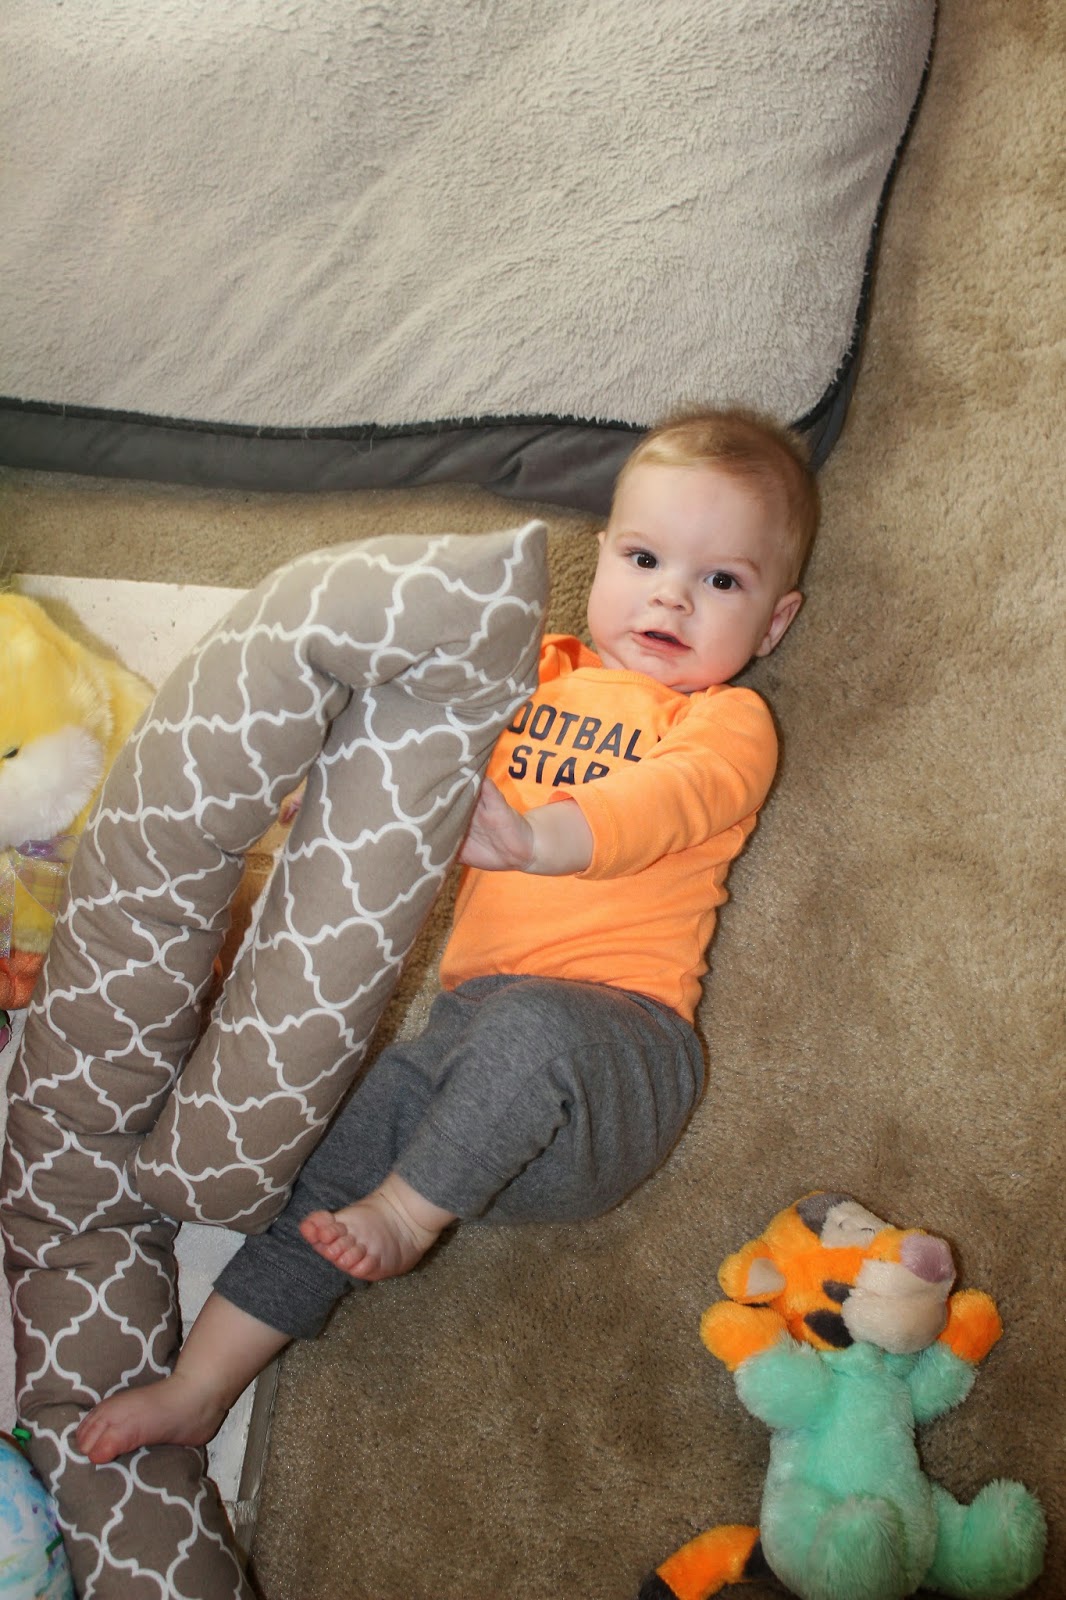
It's go time! Greyson has officially been gaining traction around the house and therefore he has officially started to scare mom and dad as he travels across the floor in what seems like seconds...so I decided I wanted to create some sort of bumper to go around our fireplace hearth as it's in the main room he plays in and it's an accident waiting to happen. So I did a few measurements, went down to Joanne Fabrics and got working!

So first off, these are the items I used to create the bumper...Fabric, batting, measuring tape, rotary cutter or scissors, pins and a sewing machine,nothing crazy.
Next I washed the fabric and laid it out so the right sides were together and there was only one fold at the top. Then marked off all my measurements and got to cutting! These below measurements were just what fit our fireplace so those could be adjusted as needed for any other size you may be working with. Width is completely subjective, I wanted the bumper to be about 4 1/2" to 5" thick just to ensure we had extra cushion for our little man's head and yet was not this huge anaconda size tube chillin' in my living room, so small worked for me.
I am bummed to say I forgot to take pictures for the remainder of my process but here are the next steps:
1. Cut the fabric as shown above and make sure NOT to cut the purple line as that will give you a pretty, no seem front bumper (Just cut 1/2 of the width so instead of cutting 5" like you do on the sides, cut 2 1/2" as the fold will make it twice the width).
2. Make sure it's all pinned before you move it to the sewing machine!
3. Sew all around (Like you would a regular square pillow - again, make sure the RIGHT  (Patterned/pretty) sides are together) and leave a 4" gap on each of the sides (The 19" pieces) as that's where you will flip the fabric right side out and where you'll stuff the batting to make it cushioned.
4. Now, roll the batting as tight as you want (The batting will come folded and I left it that way and then rolled it until it was as thick as I wanted and then just took a needle and did a couple hand stitches to keep it in place and did that the whole length of the roll (The length is that 86" I mentioned above)
5. I then cut and rolled the 2 side pieces of batting that would be going into the 19" side pieces
6. Now stuff the long batting into the long fabric sleeve first, this took some time as I had to feed it in and then keep pulling the fabric over it as it was quite long, but I eventually got it!
7. Once your front batting is in, add the batting into the sides and pin the 2 openings closed by doing a simple blind stitch by hand to close them.
8. I then bought sticky back Velcro and stuck it to the fireplace brick and onto the fabric so that it wouldn't move as prior to that, this happened...

So now after just a few simple steps, VOILA! A nice safe bumper has been created for Greyson and it goes with the decor in our living room which is an extra plus :)


So glad to now be stress free when our little guy is rolling around!