Saturday, June 20, 2015

9 month update and some water fun!

He was cracking up and thought it was too cute not to post :)
Well 9 months has brought us a bunch more laughs, cardio and excitement all around as his personality is just bursting through like no other. He's very attached to me right now which I hear happens around this 9 month mark but that doesn't make it any easier. Crossing my fingers he grows out of it shortly! His teeth are still trying to pop out so that's been a struggle as well but other than that he's such a fun little man!

Food: He's now eating both the Puffs by Gerber and we just got the OK to start with plain cheerios and he's loving it!
Naps: Same as usual- about 1-1.5 hours long twice a day and 75% of the time he'll take a 3rd 30 minute nap in the late afternoon and then sleeps wonderfully from 7pm to about 7:15am everything morning :)
Milestones:Pulling up on everything even easier now so walking will be here before we know it. He continues to do raspberries all the time which is hysterical (Where you stick your tongue out but you're kind of spitting at the same time...if that makes sense???) 

I decided, now that it's getting so hot, that it was time to buy a fun infant water activity play thing of sorts and was happy to find this awesome one called Banzai Splish Splash pool at Target, which is specific for the little ones. It doesn't show on Targets website as its just sold in stores but I did find it on Amazon which I linked above, it's just surprisingly more expensive on Amazon. It does fill up with about of inch of water in the bottom and then it has a bunch of holes to spray out water, along with fun blow up toys, a slide and a nice rainbow for shade. Totally perfect for our 90 degree weather!


This really is a great way to entertain an infant in the summer so definitely check it out over at Target!


Monday, June 1, 2015

Tie Dye DIY cover-ups and/or workout shirt

I thought I'd jump back to my younger years for a minute and see what kind of tie dying skills I could bestow upon all those that view this blog of mine. I mean, since I have all the time in the world, said no Mom to an infant...ever, I thought why not throw this fun messy project in the mix! So here's how my new little project turned out, not too bad!
 I tried out a couple different types of white shirts, the far left is a $2.99 shirt from my local craft store, middle is a basic Gerber Onesie and the far right is a Hanes super soft shirt that comes in a 3 pack at Target. So I started by washing them then did a little different of a design for each.
  • Left- One spiral (technique pictured at the upper right)
  • Middle - Was supposed to be the tiger stripe but ended up being more of just a blend of colors, which I actually really like!
  • Right - Double spiral (Double over the fabric then do the same spinning technique as I shown above)
Mix your dye, per the instructions (I used the Tulip brand) and place 3 rubber bands in a start pattern for the spiral shirts (You should then show 6 triangles in which you'll color 2 triangles pink, 2 purple and 2 teal) and then use 3 rubber bands, for the image I got on the onesie just crumple and fold the onesie in half (Watch this tutorial) and put the 3 bands on a couple inches apart and color it as desired. 
For this shirt style, I cut about 2 inches below the bottom of the sleeve and cut quite a bit more up to the shoulder. I kept cutting more and more as I'd try it on after each cut and it kept looking to bulky, so just cut until its the fit you want. I also cut about 2 inches off the collar plus an additional 2 inches at the chest area to make it lower. Then fold JUST THE BACK of the shirt in half and make as many cuts as you want, do them a little shorter at the top and cut longer strips as you go lower down the back. Then just pull them to stretch them out a little. I then made one cut up the bottom right of the shirt and made a little knot so it would fit tighter.
For this style, cut the collar and the sleeves the same as above BUT after you've done that, flip the shirt over so you're looking at the back and cut the back further in than the front so you have the razor back affect. Now cut straight across from left arm hold to right arm hole so the collar is no longer attached. See the picture above. Then cut the left over razor back into 3 pieces, braid it and run it through the sewing machine to keep it together. Take an extra 2 inch piece of fabric from everything you've cut and sew it to the back color that you've just sewn the braid too. Then wrap it around, over and back around to cover up your stitching. I then did a blind hand stitch to hold this fabric in place. Voila! You're done!

I now have a couple of fun tops to wear to the gym, running errands, working in the yard, going to the beach, anything really when you just need to throw on an easy top and you aren't trying to impress anyone :). These will of course be impressive when you make them, but they aren't so much for a nice occasion. :)

Other than dying a couple of my fingers purple, I'd say this was a pretty accident free project. So with that I will recommend to double up on gloves! But if you happen to dye yourself, nail polish remover and a lot of hand washing got the color out.

Good luck!

Sunday, May 24, 2015

8 Month Update


I'm loving how much Greyson's personality continues to come out month by month and now his brute strength is making an early appearance as well! He's just now 8 months and pulling himself up on to everything, he speed crawls through the entire house and is most recently going to each reachable window (we have low windows) and pulling out all the wood safety poles. I constantly find him playing with another one, so that has been a fun little trick of his.

Food: Still eating the same pureed food, we haven't advanced to finger food yet as his 2 teeth don't allow for much chewing
Naps: Changing a little bit, more often he's taking just 2 naps and those 2 are thankfully about 1.5 - 2 hours long
Milestones: Pulling himself up onto furniture now so I'm sure we'll have an early walker!

A little model pose action
So this month I decided to purchase the famous amber beads, the ones that so many moms are using these days, in the hopes it would help relieve some of G's teething pain. So after researching various brands I decided on the Baltic Wonder amber necklace and so far I'm glad I jumped on the bandwagon. I do have to admit I was a bit skeptical for a couple reasons...1. I wondered how these beads could really be powerful enough to target the pain, 2. I'm very impatient so if Greyson is in pain I expect whatever I buy to work instantaneously and I know that's not very realistic, but I still expect it anyway :) 3. I wasn't to keen on my strapping boy wearing a necklace - But he actually looks incredibly cute! He has this adorable little surfer vibe going now. As of now, I do think its helped as he has been less fussy during the day and is sleeping a bit better as well. I do wrap the necklace around his ankle at night to make it safer then him having it around his neck and that way is also allows the beads to be on him as close to 24/7 as possible. 

So those are just a few of the changes now that we're in our 8 month! Hope everyone has a great Memorial Day weekend!

Monday, May 18, 2015

Mothers Day and Homemade Lemonade!


I will forever remember my first Mothers Day as a perfect day with Lee and Greyson, easy going, sweet cards and gifts, yummy food and although we had to sit for what seemed like HOURS to buy new bedroom furniture it was still a fun outing as a family.

I also decided to make some lemonade as we had (and currently still have) about 92 lemons on our lemon tree in our backyard, so thought I'd use a handful and what better way than making some delicious, refreshing lemonade?! I decided to add some frozen fruit to it as well to give it some extra flavor and as it got a huge thumbs up from my hubby, it means a definite success for me!
 Someone wanted to help with the cat food...thanks Greyson!
This is what you get when Mom and Greyson are bored at the furniture store...

So back to this delicious Mixed Berry Lemonade, here is how I did it!
Picked 8 lemons off our lemon tree- Washed them and cut them in half
Used my classic juicer and juiced all of them - You will want 3 cups of lemon juice (Don't mind the orange knuckles...I had just eaten some cheese puffs lol)
 I then poured the 3 cups of lemon juice into a glass pitcher along with 2 cups of sugar and 2 cups of water. I stirred it all up really well and then added an additional 4 cups of water and about 12 oz of frozen mixed berries and mixed it all together and put it in the fridge for a couple hours.
This is a shot from the top of the pitcher with all the berries floating in it
It not only tastes amazing but it looks so fancy-shmancy too!!


Recipe
3 cups lemon juice (about 8 lemons)
2 cups sugar
6 cups water
12-14oz Frozen Mixed Berries (or any other frozen fruit you like) - Mine had strawberries, raspberries, blueberries and cherries

1. Juice all the lemons and pour into a pitcher. Add sugar and 2 cups water and mix well.
2. Add remaining 4 cups of water and mix together
3. Pour in Frozen fruit and stir together
4. Put in the fridge for a couple hours before serving

Enjoy!

Tuesday, May 5, 2015

7 Month Favorites


For the last week poor Greyson has been dealing with a rowdy cold, so schedules have been very off for the last few days. But one thing that hasn't been off is his enjoyment for his mound of toys that keeps growing in our living room. So as he catches up on some of his sleep this morning I thought I'd catch up and post his 7 month favorites!

I'd say his #1 favorite thing right now is his crawling!! He is all over the place now which has been really fun, but boy they aren't lying when they say you'll be constantly on the move once your baby starts moving. I can only imagine what it will be like when he walks! But hey, if moving more for me means burning calories without going to the gym then I'm all for it!
We bought a kit of several toys in it the other day at Target and he's been loving it! It has a bunch of fun colored shapes to play with and once he's older he can drop them into the shape slots, as well as the famous colorful rings and a xylophone (he hasn't quite grasped this one yet, so he just chews on the wand instead).
We also recently bought him this Zany Zoo activity center which he's been exploring a ton! He now goes from constantly flipping the little doors shut, that you can see above, to now pulling himself up to play with the beads on the wires at the top. So I'm so glad we picked this up as its helping with those many important motor skills.
 He's learned to flip the toy bucket over...Trouble is a comin'
I just can't resist this little face!! And yes...GO PACK GO!

Hope you all enjoyed this latest post and I have lots of fun posts in store, so stay tuned!!


Tuesday, April 28, 2015

Everyday DIY Wreath

I always want to have a wreath on my front door, but in between holidays I've never found a wreath that I've really loved so I decided to make one! I've seen a few places where people have decorated a wreath out of what looks like dead branches (sounds like a great start for a pretty wreath, right?!) so I wanted to do my take on one of those.

Here are the steps I took to make it... Just need a couple things:
  • A letter from your local craft store
  • Twig wreath
  • Faux flowers of your choosing
  • Fun ribbon
  • Hot glue gun and some wire cutters to cut the stems of the fake flowers
  • Optional ** Paint to refinish your letter if you wanted a different color
This letter was originally tan but I wanted a crisp white so I pulled a spray can from my husbands garage and sprayed away! Then left it for a few hours to dry
I hot glued the ribbon down just by places a couple dots under each strip but I left the opposite side of where I placed the letter unglued until I placed the flowers through it, that way I could hide any gaps with the ribbon.

Then from this last step, Just place the flowers in the arrangement you like and stick them straight through the wreath and just clip off the extra stems. I placed a dab of the hot glue on the backside of the wreath where the stems were just for extra security. Now time to hang it up and enjoy for months to come before the next holiday pops up!


Sunday, April 26, 2015

7 Month Baby Update!


Age: 7 months
Pureed Food:  

Not sure if I mentioned this before, but I do make all Greyson's baby food, haven't bought anything store bought yet and it's been working out really well. So now at 7 months he still gets food twice a day (one veggie and then rice cereal at bed time). So in additional to last months food, he's now also eating the following...
  • Sweet Potato  (Loved this as I think the sweeter taste caught his interest)
  • Broccoli (Really liked it at first but found he didn't feel too well after our 3 day test so we won't be doing this again)
  • Green Beans (Thicker texture now that we're stepping up our game over here)
Milestones:
  • Crawling!! He started crawling on Sunday, April 19th (The day before he turned 7 months) and now he's constantly on the move!
  • Sprouted his first two bottom teeth! We knew this was coming as he was none to happy at night and was drooling like a St. Bernard majority of the day. But yowza do those bites hurt now!
  • Sleeps steadily through the night with a hiccup here and there, but we never have to go in and sooth him anymore, so it's amazing now getting sleep- If only I could train my mind to stop waking up at a random hour as my body still thinks I need to be on high alert.
So those are the big changes now that he's 7 months and I will follow up with his 7 month favorites in a week or so when I've really pinned them down, as I know there a couple that he's all about right now but more will be added I'm sure. :)

Sunday, April 19, 2015

Tanaka Farms

 Today we fulfilled one of the pre-planned dates I created for Lee for a Valentines gift, and this months date happened to be stawberry picking at Tanaka Farm in Irvine and we had a BLAST!! 


The carrots were definitely his favorite veggie to gnaw on, and by the look on his face we'd be getting bit if we even thought of taking it away from him!
 

 This is such a perfect date for a couple or a family as they take you on a nice little tour of the property in a tractor pulled wagon and then you get to enjoy picking the fruit of that season yourself, so it's pretty darn cool! We're now eager to go back for all the additional tours they offer in future seasons. Just imagine the fun Greyson will have in the pumpkin and Christmas tree tour! I may have more than him, but so glad we can enjoy these activities with our son now, makes it that much more special. :) 

Friday, April 17, 2015

Soft and Gooey Skillet Cookie

So as many of you know, my husband travels quite a bit so when he does I have very quiet nights around here once Greyson is asleep (He's asleep by 7 or 7:15pm every night) So after I quietly shout, "I'm free!!" I figure out my next move for the remainder of the night- Which may be only an hour (Yes, sometimes I'll crash at 8pm) or it could be a whopping 3 hours of free time! So sometimes I sit in bed watching TV but 9 times out of 10 I plop down on the couch and catch up on all my recorded shows that Lee refuses to watch throughout the week, I'll read (Which is one of my favorite things to do and it's EXTREMELY hard to do with an infant!), work on finishing my cross stitch Christmas stocking for Lee (3/4 of the way done, will show when it's complete), watch a movie or bake something yummy and maybe have a nice glass of wine to indulge a little.

So during this trip that Lee was on, I decided to make a skillet cookie as not only did I want a gooey cookie but I wanted a GIANT ONE!! So here it is for you all to try out...


Ingredients:
1 stick softened butter
1/2 cup granulated sugar
3/4 cup packed brown sugar
1 egg
3/4 cup All Purpose Flour
3/4 cup Bread Flour
1/4 teaspoon salt
1/2 teaspoon baking powder
1/4 teaspoon pure vanilla extract
1/4 teaspoon cinnamon
8 oz milk chocolate chunks (NOT chips) *trust me the chunks put these on a whole other level

1. Mix the butter and all the sugars together- once combined, add the egg
2. Add all the remaining ingredients and continue mixing on low until well combined
3. Refrigerate for 1 hour
4. Preheat oven to 350 degrees
5. Scoop the dough into a iron skillet and put in the oven for 24 minutes
6. Voila! Just add a scoop of ice cream and you've got a giant cookie a la mode!


So delicious!!

Wednesday, April 8, 2015

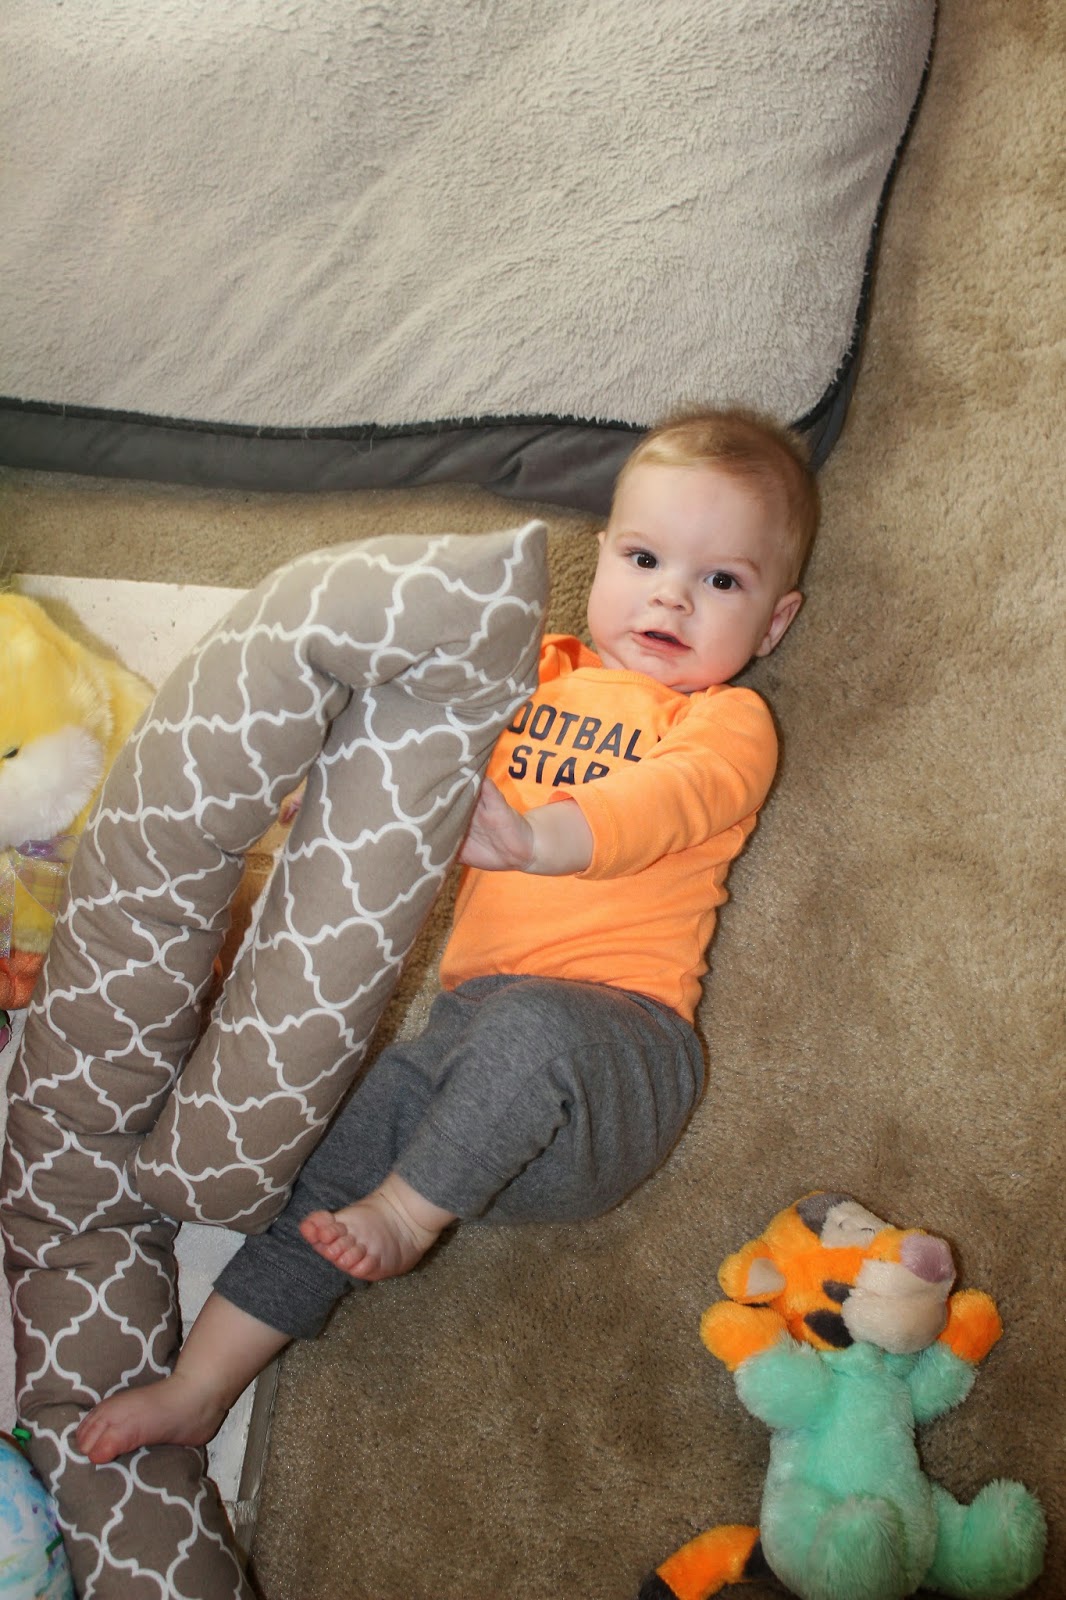
DIY Baby Bumper for your Fireplace

It's go time! Greyson has officially been gaining traction around the house and therefore he has officially started to scare mom and dad as he travels across the floor in what seems like seconds...so I decided I wanted to create some sort of bumper to go around our fireplace hearth as it's in the main room he plays in and it's an accident waiting to happen. So I did a few measurements, went down to Joanne Fabrics and got working!

So first off, these are the items I used to create the bumper...Fabric, batting, measuring tape, rotary cutter or scissors, pins and a sewing machine,nothing crazy.
Next I washed the fabric and laid it out so the right sides were together and there was only one fold at the top. Then marked off all my measurements and got to cutting! These below measurements were just what fit our fireplace so those could be adjusted as needed for any other size you may be working with. Width is completely subjective, I wanted the bumper to be about 4 1/2" to 5" thick just to ensure we had extra cushion for our little man's head and yet was not this huge anaconda size tube chillin' in my living room, so small worked for me.
I am bummed to say I forgot to take pictures for the remainder of my process but here are the next steps:
1. Cut the fabric as shown above and make sure NOT to cut the purple line as that will give you a pretty, no seem front bumper (Just cut 1/2 of the width so instead of cutting 5" like you do on the sides, cut 2 1/2" as the fold will make it twice the width).
2. Make sure it's all pinned before you move it to the sewing machine!
3. Sew all around (Like you would a regular square pillow - again, make sure the RIGHT  (Patterned/pretty) sides are together) and leave a 4" gap on each of the sides (The 19" pieces) as that's where you will flip the fabric right side out and where you'll stuff the batting to make it cushioned.
4. Now, roll the batting as tight as you want (The batting will come folded and I left it that way and then rolled it until it was as thick as I wanted and then just took a needle and did a couple hand stitches to keep it in place and did that the whole length of the roll (The length is that 86" I mentioned above)
5. I then cut and rolled the 2 side pieces of batting that would be going into the 19" side pieces
6. Now stuff the long batting into the long fabric sleeve first, this took some time as I had to feed it in and then keep pulling the fabric over it as it was quite long, but I eventually got it!
7. Once your front batting is in, add the batting into the sides and pin the 2 openings closed by doing a simple blind stitch by hand to close them.
8. I then bought sticky back Velcro and stuck it to the fireplace brick and onto the fabric so that it wouldn't move as prior to that, this happened...

So now after just a few simple steps, VOILA! A nice safe bumper has been created for Greyson and it goes with the decor in our living room which is an extra plus :)


So glad to now be stress free when our little guy is rolling around!

Monday, April 6, 2015

Easter Weekend


Push me Dad! Push me!
This is the PERFECT floater for any infant to get to glide around in!! Greyson loved it!
We enjoyed a few firsts for Greyson this weekend! He had his first pool experience and his first Easter! We headed over to my parents house to enjoy their nicely heated pool as to not shock the little guy and he couldn't have enjoyed it more! The squeals of excitement definitely said it all. I told Lee I think he's going to be a little water bug as he never wanted to get out...His meal time and nap time had arrived but those were of no interest to him when he had this pool to be swimming in!
So excited to open his Easter basket!
 

Grandpa and Greyson having a sweet little discussion with each other
We loved having my parents over for Easter dinner! Greyson was incredibly happy chatting away with Grandma and Grandpa :)
It was overall a perfect weekend but now we're back to the weekly grind!